Hands-on with NAT64 and DNS64
In my last post I talked about the basics of IPv6 and how it’s implemented in an AWS VPC. In addition to IPv6-only subnets, AWS also announced support for NAT64 and DNS64. If you don’t know what that means or why it’s useful, stick around as we walk through what these new features are, how they work, and get hands-on with a demo.
Overview
In a nutshell, NAT64 and DNS64 are transitional capabilities that enable communication between IPv6 and IPv4 resources. By default, hosts and networks using IPv4 aren’t able to interact with hosts or networks using IPv6 - they’re completely separate stacks. NAT64 and DNS64 together form one of the three options, along with tunneling and dual-stack networking, used for enabling IPv6 to IPv4 communication. As the names imply, DNS64 manages translation for DNS records, while NAT64 performs the actual IPv6-to-IPv4 translation at layer 3.
Here’s a walkthrough of how NAT64 and DNS64 work together, using an AWS VPC as an example:
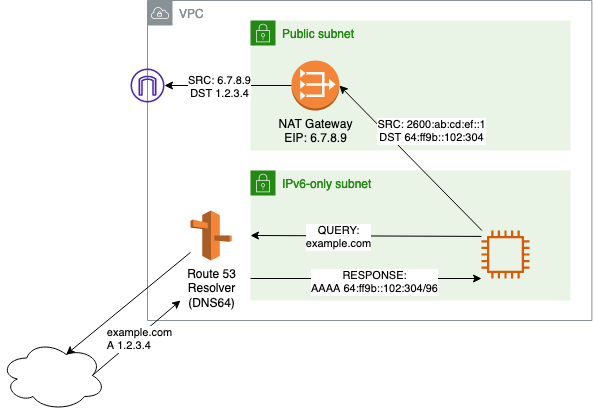
- The IPv6-only client queries its DNS server for a particular domain (e.g.
app1.cloud.example.com) - The DNS server checks for available AAAA records for
app1.cloud.example.com- If AAAA records are available, the DNS server returns those to the client
- If AAAA records are NOT available, the DNS server will use the IPv4 addresses in the available A records to synthesize an IPv6 address to return to the client. Route 53 Resolver uses the “well-known” prefix
64:ff9b::/96defined in RFC 6052 to create the IPv6 address.
- The IPv6 client sends traffic to the synthesized IPv6 address, which is routed to the NAT64 gateway
- The NAT64 gateway translates the IPv6 packet to IPv4 and sends it to the IPv4 destination address.
Getting Started
Create a new VPC with an IPv6 CIDR block, or add an IPv6 CIDR block to an existing VPC. Check out this walkthrough if you haven’t done this before. For this example setup, I have two VPCs attached to a Transit Gateway with full routing between them. The actual topology doesn’t matter - we could also use a VPC peering connection - since we’ll be performing all of the NAT in the source VPC. Don’t forget to create a NAT gateway as well!
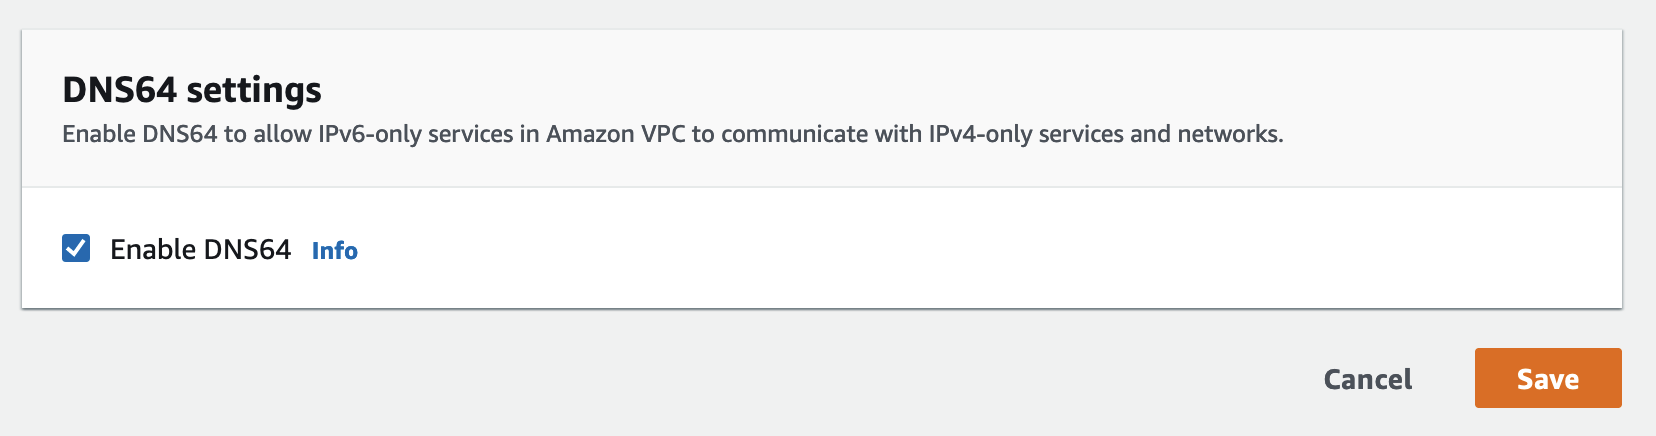
Once you’ve added the IPv6 CIDR blocks and created the IPv6-only subnets, modify the IPv6 subnets to enable DNS64.
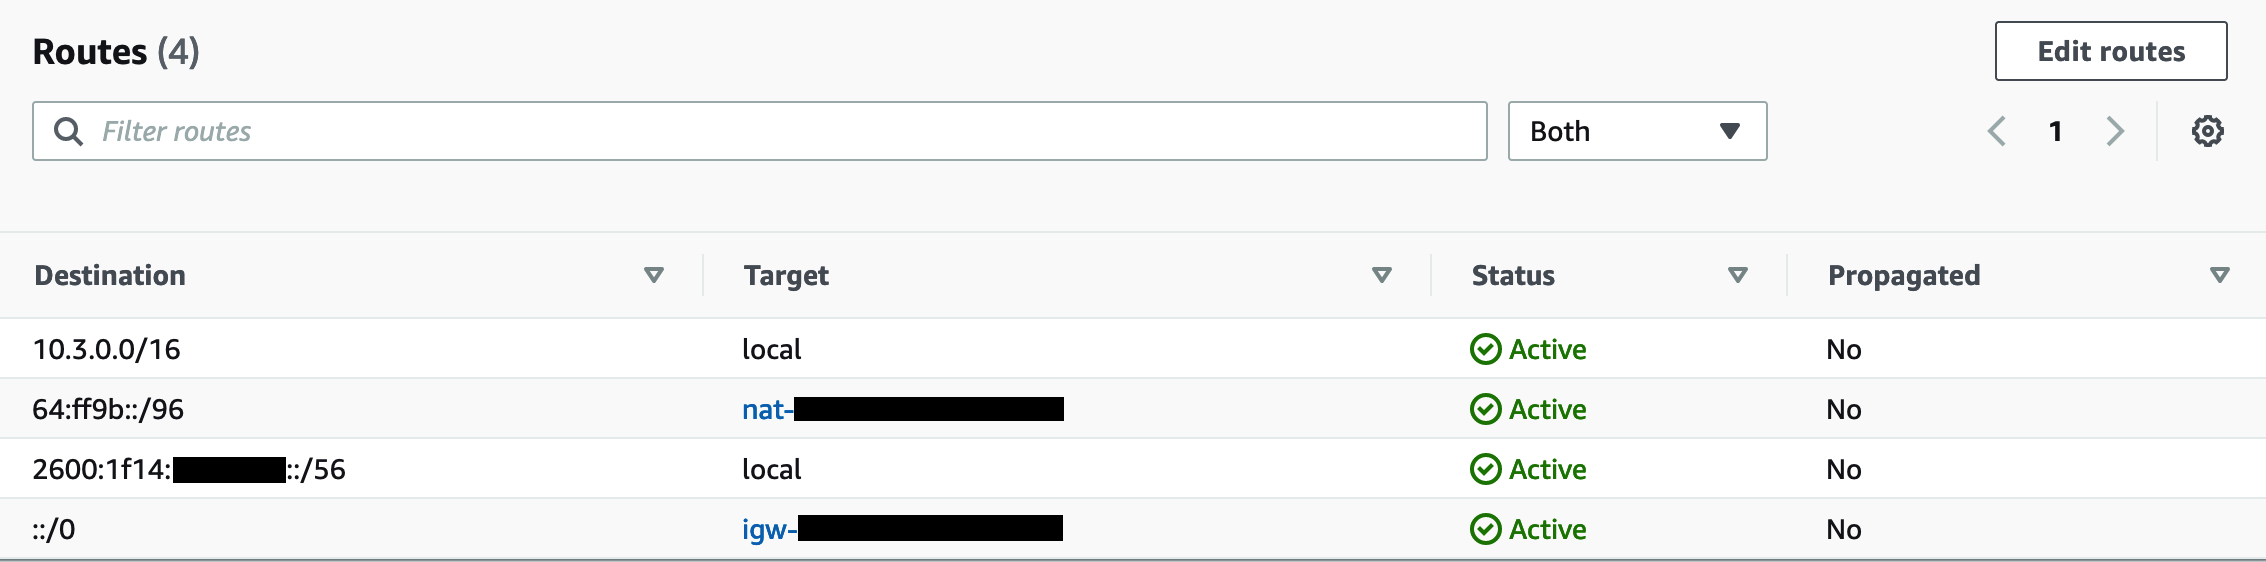
We also need to add a route in the subnet’s route table to the NAT64 prefix range 64:ff9b::/96 with the NAT gateway as the destination. This will allow the IPv6-only subnets to route the NAT64 traffic correctly.
Launch an EC2 instance in the IPv6-only subnet - make sure to choose a Nitro instance type - and connect via SSH or SSM. While SSM is the simplest option, if you need to use SSH but your ISP doesn’t yet support IPv6 (or you haven’t implemented it in your own network), you can use a dual-stack bastion host.
EC2 Instance Connect is not currently supported for IPv6-only hosts.
Synthesizing Records with DNS64
Let’s start by testing our private hosted zone (PHZ) cloud.example.com which is associated with the VPC. We can query this PHZ from our IPv6-only instance just like we would on an IPv4-enabled instance:
$ dig -6 app1.cloud.example.com +short
10.1.129.112
In order to illustrate what happens with DNS64, run the same query but specify IPv6 AAAA records in the request:
$ dig -6 app1.cloud.example.com -t AAAA +short
64:ff9b::a01:80aa
The PHZ for cloud.example.com doesn’t have any AAAA records for app1, only A records, so the Route 53 Resolver uses DNS64 to return the synthesized address for the host. This also works with public addresses:
$ dig -6 amazon.com -t AAAA +short
64:ff9b::36ef:1c55
64:ff9b::b020:67cd
64:ff9b::cdfb:f267
Remember that DNS64 only works if you have A records available for the domain being queried!
NAT64 in Action
With these synthesized IPv6 addresses, we can now connect to our IPv4-only resources - we don’t need to make any additional changes to the inter-VPC connectivity (e.g. TGW) or the destination VPC.
# Use the -w flag to output the remote IP
$ curl -6 -w '%{remote_ip}\n' app1.cloud.example.com
Hello from App1 (us-east-1a)
64:ff9b::a01:80aa:80
You can also manually synthesize an IPv6 address by doing the IP address to hexadecimal conversion yourself, and adding the NAT64 prefix. In this example, I used this tool to convert 10.1.129.112 to a 32-bit hex value of 0x0a018170. Each IPv6 field consists of 16 bits, so add a colon to divide the 32-bit address into two 16-bit groups. The final resulting address works as expected:
$ curl [64:ff9b::0a01:8170]
Hello from App1 (us-east-1b)
Running a packet capture on the host side shows the NAT Gateway IPv4 address as the traffic source.
$ sudo tcpdump -i eth0 tcp port 80 -n -q
tcpdump: verbose output suppressed, use -v or -vv for full protocol decode
listening on eth0, link-type EN10MB (Ethernet), capture size 262144 bytes
19:58:00.464527 IP 10.3.1.201.65090 > 10.1.129.112.http: tcp 0
19:58:00.464565 IP 10.1.129.112.http > 10.3.1.201.65090: tcp 0
19:58:00.536282 IP 10.3.1.201.65090 > 10.1.129.112.http: tcp 0
19:58:00.536318 IP 10.3.1.201.65090 > 10.1.129.112.http: tcp 84
19:58:00.536345 IP 10.1.129.112.http > 10.3.1.201.65090: tcp 0
19:58:00.536637 IP 10.1.129.112.http > 10.3.1.201.65090: tcp 303
19:58:00.614609 IP 10.3.1.201.65090 > 10.1.129.112.http: tcp 0
19:58:00.614779 IP 10.3.1.201.65090 > 10.1.129.112.http: tcp 0
19:58:00.614833 IP 10.1.129.112.http > 10.3.1.201.65090: tcp 0
19:58:00.686257 IP 10.3.1.201.65090 > 10.1.129.112.http: tcp 0
While these steps are just for illustration purposes here, they can also be used to troubleshoot NAT64 in a real-world implementation. Note that in testing, I wasn’t able to make traceroute produce any useful output, possibly due to the NAT64 translation - your mileage may vary.
Wrapping Up
With NAT64 and DNS64, adding support for IPv6 workloads becomes less onerous than enabling dual-stack support across your AWS network. Notice that in this example, we didn’t need to make any changes to the destination VPC or the intermediate network path (i.e. Transit Gateway) to enable IPv6 connectivity. Instead of deploying IPv6 across your entire cloud network, you can implement it strategically for workloads that need the expanded IP availability (e.g. EKS or K8s clusters) while maintaining access to on-prem or legacy IPv4 workloads.
A few caveats to keep in mind:
- The usual NAT Gateway per-GB data processing charges apply for all IPv6 traffic as well
- The source IPv6 address isn’t preserved when using NAT64, which means no source-IP filtering
- Similarly, AWS Network Firewall and Gateway Load Balancer don’t currently support IPv6
- This design doesn’t allow inbound connections from IPv4 clients (no DNAT)
- DNSSEC doesn’t work with DNS64 - learn more about that here
Of these, the cost aspect might be the most significant pain point - if you’re planning on transferring a lot of data between your IPv6-only and IPv4-only environments, the per-GB charges can add up quickly.
As always, make sure you have a clear understanding of the cost before implementing this solution in production. If you can live with these limitations, however, or just want to give IPv6 a try before diving in, this is a pretty painless way to get started.